Are you tired of your garden beds and borders looking messy and unruly? Do you want to create a polished and well-defined lawn edge that enhances the overall aesthetics of your garden? Then it’s time to learn how to install lawn edging!
Installing lawn edging is a simple and rewarding DIY project that can be completed in just a few hours. Whether you’re a seasoned gardener or a beginner, this guide will walk you through the step-by-step process of installing lawn edging to achieve a professional and tidy finish.
Key Takeaways:
- Installing lawn edging creates a neat and manicured look for your yard.
- Plastic edging is a durable and low-maintenance option for enhancing the aesthetics of your garden.
- Measure the garden beds and borders before installing lawn edging to ensure a precise fit.
- Dig a trench around the bed to create a vertical “wall” for supporting the edging.
- Join the strips of edging using couplers to minimize the appearance of seams.
Measure the Garden Beds and Borders
Before installing lawn edging, it’s essential to accurately measure the garden beds and borders. This ensures a precise fit and a seamless finish. Here’s how to go about it:
- Lay rope or twine: Start by laying rope or twine along the desired shape of the garden bed or border. This will help visualize the edge and ensure a smooth and flowing curve.
- Trace the curvature: Use marking paint to trace along the rope or twine, marking the exact line of the edge. This will serve as a guide during the installation process.
- Cut the rope: Once the curvature is marked, cut the rope to the appropriate length using scissors or a utility knife. Make sure to trim it precisely to match the shape of the garden bed or border.
- Measure the length: Measure the length of the rope to determine the amount of plastic edging required. Add an extra 10 percent to account for any waste during the installation process.
By measuring the garden beds and borders accurately, you can ensure a perfect fit for the plastic edging and achieve a professional-looking lawn edge. Take your time with this step to avoid any errors in the installation process.
| Measurement | Steps |
|---|---|
| Lay Rope or Twine | Start by laying rope or twine along the desired shape of the garden bed or border. |
| Trace the Curvature | Use marking paint to trace along the rope or twine, marking the exact line of the edge. |
| Cut the Rope | Once the curvature is marked, cut the rope to the appropriate length using scissors or a utility knife. |
| Measure the Length | Measure the length of the rope to determine the amount of plastic edging required. Add an extra 10 percent for waste. |
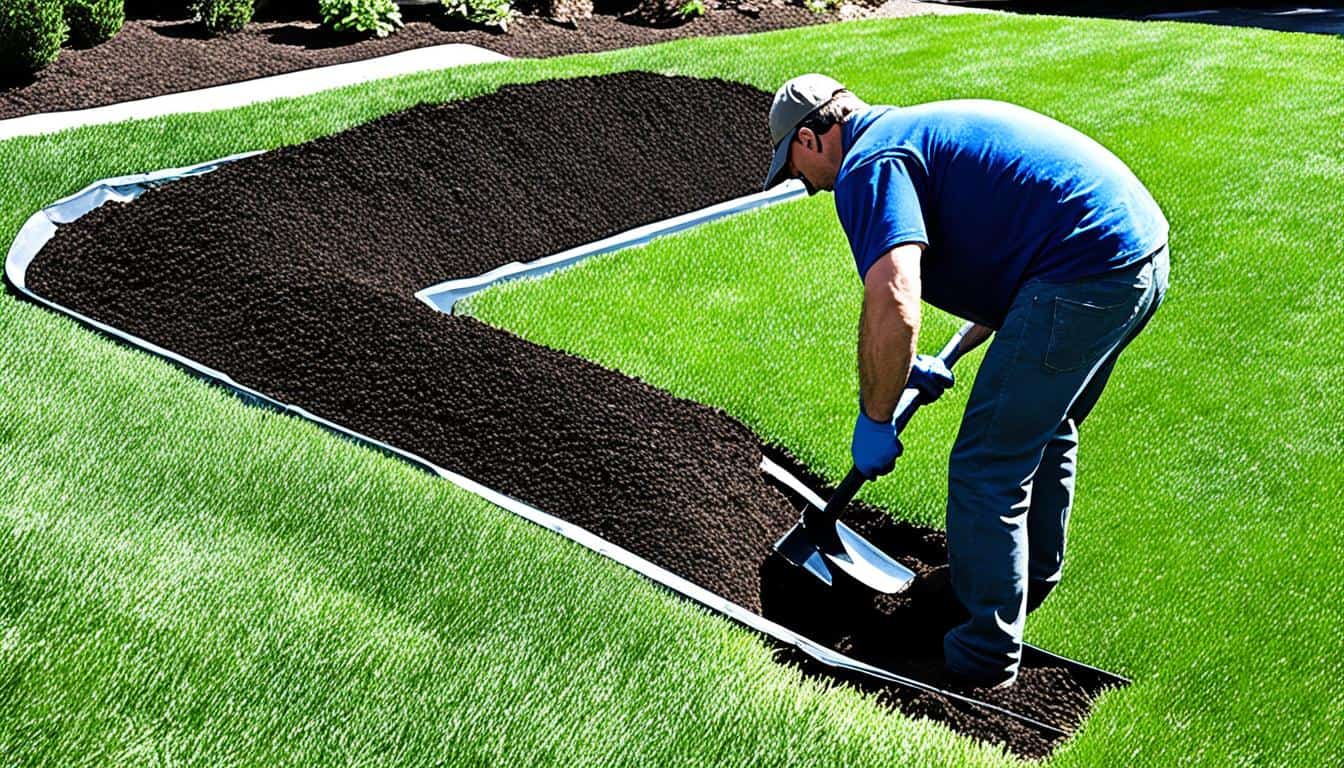
Dig a Trench Around the Bed
Creating a trench around the bed is a crucial step in installing lawn edging. It provides a stable foundation for the edging and helps define the boundaries of your garden. To dig the trench, you’ll need a round point shovel or a spade.
Start by following the marked curvature of the bed with your shovel or spade. Apply steady pressure to break through the soil and create a clean cut along the edges. Make sure to dig the trench to a uniform depth of three to four inches, ensuring stability and a consistent appearance.
Once the trench is dug, you’ll have a vertical “wall” that will support the edging and keep it in place. This creates a barrier between your lawn and garden bed, preventing grass from encroaching and giving your landscape a polished look.
Trim the Edging to Fit
Once you have measured the garden beds and dug the trench, it’s time to trim the plastic edging strips to fit perfectly. This step ensures a seamless and professional-looking lawn edge. Here’s how to get it done:
Tools Needed for Trimming:
- Tin snips
- Pruning shears
- Scissors
- Utility knife
Using any of these tools, carefully trim the plastic edging strips to the desired length. Remember to measure twice and cut once to avoid any mistakes. It’s always better to cut the edging slightly longer than needed, as you can always trim it further if necessary.
For a seamless look, it is recommended to join the edging strips in or near the middle of the run, rather than at corners or sharp bends. This technique helps maintain a smooth and continuous line, resulting in an aesthetically pleasing lawn edge.
Take your time while trimming the edging to ensure precision and accuracy. A clean and well-fitting trim will make the installation process much easier and give your lawn a polished appearance.
Once you have successfully trimmed the plastic edging strips, you’re ready to move on to the next step: joining the strips together.
Join the Strips of Edging
To achieve a seamless and professional look, it is essential to join the strips of edging together effectively. This step ensures that the edging remains durable and visually appealing. The following process outlines how to join edging strips using a coupler and top channels.
- Slide a coupler halfway into one of the top channels: Take one of the edging strips and insert a coupler halfway into one of the top channels. This will serve as the starting point for joining the strips together.
- Pinch the first strip to hold it in place: Pinch the first strip of edging to secure it against the coupler, ensuring it stays in place as you join the additional strips.
- Fit the second strip into the coupler: Take the second strip of edging and fit it into the coupler. Ensure that it lines up properly with the first strip and sits securely within the coupler.
- Apply pressure to tightly butt the pieces against each other: Once the second strip is in place, apply pressure to tightly butt the two pieces of edging against each other. This minimizes the appearance of the seam and creates a seamless transition between the strips.
By following these steps, you can successfully join edging strips using a coupler and top channels. This method ensures a secure and professional connection for a neat and visually pleasing lawn edge.
Image Caption: Illustration of joining edging strips using a coupler and top channels.
Backfill the Edging
After carefully inserting the lawn edging into the trench, it’s time to backfill and secure it firmly in place. Follow these steps to ensure a sturdy and professional installation:
- Use a shovel or spade: Retrieve the soil that was saved earlier and use a shovel or spade to backfill the trench. This will provide support and stability to the edging.
- Press against the trench wall: As you backfill the soil, press the edging firmly against the trench wall. This will create a snug fit and prevent any shifting.
- Pack the soil: While backfilling, pack the soil tightly around the edging. This will further reinforce its position and maintain a clean edge.
- Compact the soil: To ensure a secure installation, utilize the stomping technique. Stomp along the edging with your feet, compacting the soil and providing additional stability.
By backfilling, pressing, packing, and compacting, you can be confident that your lawn edging will stay in place and retain its professional appearance for a long time.
Expert Tip:
“When backfilling, pay extra attention to compacting the soil properly. This helps prevent the edging from shifting or sagging over time.”
Anchor the Edging
To ensure a secure installation, it is important to anchor the edging in place. This will help prevent shifting or movement over time. Follow these steps to anchor the edging:
- Step 1: Insert Edging Stakes – Place edging stakes at 3 to 4 foot intervals along the length of the edging. These stakes will provide stability and support.
- Step 2: Use a Rubber Mallet – With the edging stakes in place, use a rubber mallet to drive each stake into the ground. Start at the lower outside face of the edging and drive the stake at a slight angle towards the other side.
- Step 3: Ensure a Secure Installation – Apply enough force with the rubber mallet to securely anchor the edging to the ground. This will help keep the edging in place, even in high-traffic areas.
By properly anchoring the edging using edging stakes and a rubber mallet, you can enjoy a durable and long-lasting lawn edge.
| Tools and Materials | |
|---|---|
| Edging Stakes | |
| Rubber Mallet |
Put On the Finishing Touches
Now that the plastic edging is securely in place, it’s time to put on the finishing touches to complete the lawn edging installation. These final steps will ensure that your lawn edge looks clean, tidy, and professional.
First, lightly water the area with a garden hose. This will help settle the soil and ensure that the edging feels sturdy and well-supported. The water will also help the soil settle around the edging, creating a more seamless and natural appearance.
Next, take a close look at the installed edging and evaluate if any areas need additional support or if the edging could benefit from being raised in low-lying spots. If necessary, add more soil to these areas, filling in any gaps or unevenness. Use a shovel or your hands to carefully add the soil and gently pack it down to ensure proper stability.
Once you have added the soil, take a step back and admire the final result. You should now have a clean and aesthetically pleasing lawn edge that enhances the overall look of your garden. The plastic edging will provide a neat and manicured appearance, while also helping to prevent weeds from encroaching on your lawn.
Remember, the finishing touches are essential for achieving a polished and professional lawn edging installation. Take your time to ensure that everything looks just right before moving on to enjoy your beautifully landscaped yard.
Plastic Edging for a Neat and Manicured Yard
Installing plastic edging along borders and garden beds not only gives your yard a tidy and manicured look but also helps keep mulch in place and prevents weed growth. Plastic edging is a durable and low-maintenance option for enhancing the aesthetics of your yard.
“Plastic edging is a versatile and cost-effective solution for creating clean and defined borders in your yard,” says landscaping expert Emma Johnson. “It’s lightweight, easy to install, and requires minimal maintenance, making it a popular choice among homeowners.”
The Benefits of Plastic Edging
Plastic edging offers several advantages that make it an excellent choice for achieving a neat and manicured yard:
- Easy Installation: Plastic edging is designed for simple installation, requiring minimal tools and expertise. You can easily mold and shape it to fit the contours of your garden beds and borders.
- Durable: Made from high-quality materials, plastic edging is built to withstand the elements and maintain its shape over time. It won’t rust, rot, or degrade, ensuring long-lasting performance.
- Low Maintenance: Once installed, plastic edging requires little to no maintenance. Unlike other materials, such as wood or metal, plastic edging doesn’t require staining or sealing and is resistant to insects and decay.
- Prevents Weed Growth: By creating a physical barrier between your garden beds and the surrounding areas, plastic edging helps prevent weeds from infiltrating your landscape. This reduces the need for frequent weeding and saves you time and effort.
- Enhances Landscape Aesthetics: Plastic edging provides a clean and defined border that adds visual appeal to your yard. Its sleek and unobtrusive design allows the focus to remain on your plants and flowers, creating a professional look.
Whether you have a sprawling garden or a small backyard, using plastic edging can transform your outdoor space into a well-maintained and visually pleasing oasis.
| Advantages of Plastic Edging | Disadvantages of Plastic Edging |
|---|---|
| Easy installation | May not be as visually appealing as other materials |
| Durable and long-lasting | May require additional stakes for stability in certain soil conditions |
| Low maintenance | May be more expensive than other edging options |
| Prevents weed growth | |
| Enhances landscape aesthetics |
Choose the Right Lawn Edging Material
When it comes to lawn edging, selecting high-quality materials is essential to ensure a lasting and visually appealing result. Consider the specific needs and style of your landscape project to determine the most suitable edging material. Here are the options to choose from:
- Plastic: Lightweight and versatile, plastic lawn edging material is a popular choice. It is cost-effective, easy to install, and resistant to rotting and rusting. Plastic edging is available in various colors and styles, allowing you to find the perfect match for your garden.
- Metal: Metal edging offers durability and a sleek appearance. Common options include aluminum and steel. Aluminum is lightweight, corrosion-resistant, and easy to work with. Steel edging, on the other hand, provides exceptional strength and stability.
- Stone: For a timeless and natural look, stone edging is a great choice. Options such as brick, concrete, or natural stone can add an elegant touch to your landscape. Stone edging is durable and can withstand harsh weather conditions, ensuring a lasting solution.
Whichever material you choose, make sure it complements the overall design of your yard and meets your specific requirements. Now you can proceed to the installation process with confidence, knowing that you have selected the perfect lawn edging material.
Installation Tips for Different Types of Edging
When it comes to installing different types of edging, such as lawn edging and paver edging, it’s important to follow specific techniques to ensure a successful installation. Here are some tips to help you with the process:
Lawn Edging Installation Tips
Tip 1: Use the Overlap Method: When joining two pieces of lawn edging together, utilize the overlap method. This involves overlapping the ends of the edging strips to create a seamless look and prevent gaps.
Tip 2: Secure with Steel Stakes: To keep the lawn edging in place, use steel stakes. Insert the stakes at regular intervals, ensuring they penetrate the ground securely and hold the edging firmly in position.
Paver Edging Installation Tips
When installing paver edging, consider the following recommendations for a successful outcome:
- Position Along the Installation Perimeter: Place the paver edging along the outer perimeter of the paver installation area. This helps define the edges and provides a clear boundary for the pavers.
- Secure with Non-Bending Steel Anchoring Stakes: To ensure the paver edging stays in place, it’s important to use non-bending steel anchoring stakes. These stakes should be driven into the ground at regular intervals, applying enough force to keep the edging stable and secure.
By following these installation tips, you can achieve a professional and durable result when installing different types of edging, whether it’s lawn edging or paver edging.
Conclusion
Installing lawn edging is a straightforward and fulfilling do-it-yourself project that can be completed in just a few hours. By following the proper steps and techniques, you can create a clean and professional-looking lawn edge that enhances the overall aesthetics of your garden. Choosing the right edging materials and considering the specific needs of your landscape will ensure a successful installation.
Lawn edging installation begins with measuring the garden beds and borders, followed by digging a trench and trimming the edging strips to the desired length. Joining the strips with couplers and backfilling the trench with soil provides stability and support. Anchoring the edging with stakes and adding the finishing touches, such as watering and adjusting the soil, will result in a polished and visually appealing lawn edge.
Not only does lawn edging create a neat and manicured yard, but it also serves practical purposes. Plastic edging helps keep mulch in place and prevents weed growth, reducing the need for constant maintenance. Whether you choose plastic, metal, or stone as your edging material, selecting high-quality options guarantees a lasting and durable solution for your landscape.
In conclusion, with the right materials and careful attention to detail, lawn edging installation can transform your garden into an elegant and well-defined space. Enjoy the satisfaction of creating a professional-looking lawn edge that adds value, beauty, and functionality to your outdoor environment.
FAQ
How do I install lawn edging?
To install lawn edging, you’ll need to measure the garden beds and borders, dig a trench around the bed, trim the edging to fit, join the strips of edging, backfill the edging, anchor the edging, and put on the finishing touches. These steps will help create a neat and professional-looking lawn edge.
How do I measure the garden beds and borders?
Before installing lawn edging, measure the garden beds and borders by laying rope or twine along the desired shape and using marking paint to trace the curvature. Cut the rope to size and measure its length to determine the amount of plastic edging needed, adding 10 percent for waste.
What tools should I use to dig a trench around the bed?
Use a round point shovel or spade to dig a trench along the edges of the bed, following the marked curvature. Dig the trench to a uniform depth of three to four inches, creating a vertical “wall” to support the edging.
How do I trim the edging to fit?
Trim the plastic edging strips to the desired length using tin snips, pruning shears, scissors, or a utility knife. For a seamless look, join the pieces in or near the middle of the run, avoiding corners and sharp bends.
How do I join the strips of edging together?
Slide a coupler halfway into one of the top channels of the edging and pinch the first strip to hold it in place. Fit the second strip into the coupler and apply pressure to tightly butt the pieces against each other, minimizing the appearance of the seam.
How do I backfill the edging?
Use a shovel or spade to backfill the trench with the soil saved earlier. As you backfill, press the edging against the trench wall and pack the soil to keep the edging firmly in place. Compact the soil by stomping along the edging with your feet.
How do I anchor the edging in place?
Anchor the edging in place by inserting edging stakes at 3 to 4-foot intervals. Use a rubber mallet to drive each stake at a slight angle from the lower outside face of the edging to the other side, ensuring a secure installation.
What are the finishing touches for lawn edging installation?
Lightly water the area with a garden hose to settle the soil and ensure the edging feels sturdy. Add more soil to areas that need additional support or to raise the edging in low-lying spots. The final result should be a clean and aesthetically pleasing lawn edge.
What are the benefits of using plastic edging for my yard?
Installing plastic edging along borders and garden beds not only gives your yard a tidy and manicured look but also helps keep mulch in place and prevents weed growth. Plastic edging is a durable and low-maintenance option for enhancing the aesthetics of your yard.
How do I choose the right lawn edging material?
When selecting lawn edging, choose high-quality materials that are guaranteed to last. Consider the specific needs and style of your landscape project to determine the most suitable edging material, whether it’s plastic, metal, or stone.
What installation tips should I follow for different types of edging?
Different types of edging, such as lawn edging and paver edging, may require specific installation techniques. For lawn edging, use the overlap method to join two pieces together and secure the edging with steel stakes. Paver edging should be positioned along the installation perimeter and secured with non-bending steel anchoring stakes.
How long does it take to install lawn edging?
Installing lawn edging is a simple and rewarding DIY project that can be completed in just a few hours. By following the proper steps and techniques, you can create a clean and professional-looking lawn edge that enhances the overall aesthetics of your garden. Remember to choose the right edging materials and consider the specific needs of your landscape.


