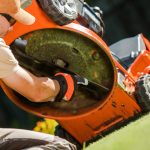

A self-propelled mower that has stopped pulling itself along feels broken, but the fault is usually one cheap part. If the engine still starts and the blade still spins, yet you find yourself shoving the machine across the grass, the drive belt has almost certainly worn or stretched. That belt is a low-cost item, and swapping it is an hour’s work on a set of sawhorses. Here is how the belt does its job, how to read the signs that it is failing, and how to fit a new one without paying a repair shop to do it for you.
How the Drive Belt Actually Works
On most walk-behind mowers the blade bolts straight onto the engine crankshaft, but the drive to the wheels takes a longer route. A belt loops from a pulley on the engine’s output shaft down to a pulley on the transmission, and the transmission turns the drive wheels. As the Family Handyman guide to seasonal mower servicing puts it, “many self-propelled lawnmowers use a belt to transfer power from the engine’s output shaft to the drive wheels. These belts, much like the fan belt on your car, can dry out and stretch over time, rendering them less effective.”
The belt grips by friction. A V-shaped belt wedges into a matching groove in each pulley, and that wedging is what lets a thin rubber loop carry the engine’s power to the wheels. The problem is that the same friction generates heat, and heat is the enemy of rubber. Over years of use the belt hardens, its surface glazes smooth, and it stretches a few millimetres too long to grip properly. Spilled oil, stray petrol and ground-in grit all speed that ageing along. Once the belt no longer wedges tightly into the pulley grooves, it slips, and a slipping belt cannot pull the mower forward.
The Signs a Belt Is on Its Way Out
The clearest sign is the obvious one. The mower loses its drive, refusing to move forward or struggling on the smallest slope while the engine runs on happily. Slopes expose a tired belt first, as pulling the machine uphill demands the most grip and a worn belt gives up there before it fails on the flat.
Listen and smell, not just watch. A belt that has started to slip often squeals, whines or chirps when you engage the drive, the sound of rubber skidding across a pulley face rather than gripping it. That skidding builds heat, so a hot, acrid burning smell, sometimes with blackened marks near the pulleys, means the belt is overheating and needs to come off before it snaps. Tip the mower up and look at the belt directly. Cracks across the underside, a frayed or stringy edge, chunks missing from the V, or a hard shiny glaze on the gripping faces all confirm the belt is finished. A belt that has stretched but not yet cracked can look fine and still slip, so if the drive is weak and the belt is more than a few years old, treat age as its own symptom.
What You Need and How to Stay Safe
Before a spanner touches the machine, pull the spark plug wire off the spark plug. This is the one step you never skip, as it makes it impossible for the engine to fire while your hands are near the blade and pulleys. The Family Handyman guide flags the same rule for every job under the deck.
The tools are basic: a socket and ratchet set, a screwdriver, a pair of pliers, work gloves and eye protection. A socket set runs about 20 to 30 pounds or 25 to 38 dollars if you do not already own one. The belt itself is the key decision. The exact replacement, ordered by your mower’s model and part number, costs roughly 12 to 25 pounds or 15 to 32 dollars and is guaranteed to be the right length and profile. A universal belt cut to fit is cheaper at around 8 to 15 pounds or 10 to 19 dollars, but a belt even slightly too long will slip and one too short will strain the bearings, so the model-matched part is the safer buy. Photograph the old belt’s routing before you touch it, as that photo is the map you will follow when the new one goes on.
Find the exact part by reading the model and specification numbers off the sticker on the mower deck or under the engine cover, then quote those to the parts supplier rather than guessing from the belt shape. One trap catches people on machines that carry two belts. A drive belt runs the wheels, while a separate blade belt on some models runs the cutting deck, and the two are different lengths. Confirm which one has failed before you order, as fitting a drive belt where a blade belt should go leaves you back where you started.
Replacing the Belt Step by Step
Tip the mower so the air filter and carburettor face upward, which keeps oil and fuel from flooding the carburettor while the machine is on its side. Underneath you will find a belt cover or drive housing held by a few screws or bolts. Take it off and the belt routing is laid bare. Compare it to your photograph so you know exactly which pulleys the belt wraps and in what order.
Most drive systems hold tension with a spring-loaded idler pulley. Ease that idler across to slacken the belt, then work the old belt off the pulleys one at a time, starting at the engine pulley and freeing the transmission end last. Fit the new belt the same way in reverse, seating it fully into the groove of each pulley and making sure it sits inside any belt guides or keepers rather than riding over them. A belt sitting proud of a guide will jump off the moment you engage the drive. Let the idler return to tension the new belt, refit the cover, and reconnect the spark plug wire only once everything is buttoned up. Start the mower and test the drive on level ground before you tackle a slope.
Get the Tension Right and Make It Last
Tension is where a good repair is won or lost. A drive belt wants a small amount of give, deflecting a little under thumb pressure on its longest run between two pulleys, not stretched drum tight. Overtighten it and you load the transmission and idler bearings every second the engine runs, wearing out parts that cost far more than the belt. Leave it too loose and it slips, glazes and cooks itself in a fortnight. If your mower has a tension adjuster on the cable or idler, set it so the drive engages firmly without the belt screaming when you let the lever go.
Keep the new belt alive by keeping it clean. Wipe oil and grease off the pulleys before fitting, and scrape caked grass out of the drive housing, as trapped clippings hold moisture against the rubber and grind at it like sandpaper. Check the belt at the end of each season when you clean the deck, store the mower somewhere dry so the rubber does not perish over winter, and a drive belt will happily last many years. Match the part to your machine, take the extra minute to route and tension it correctly, and one of the most common self-propelled mower faults becomes an hour you never have to think about again.