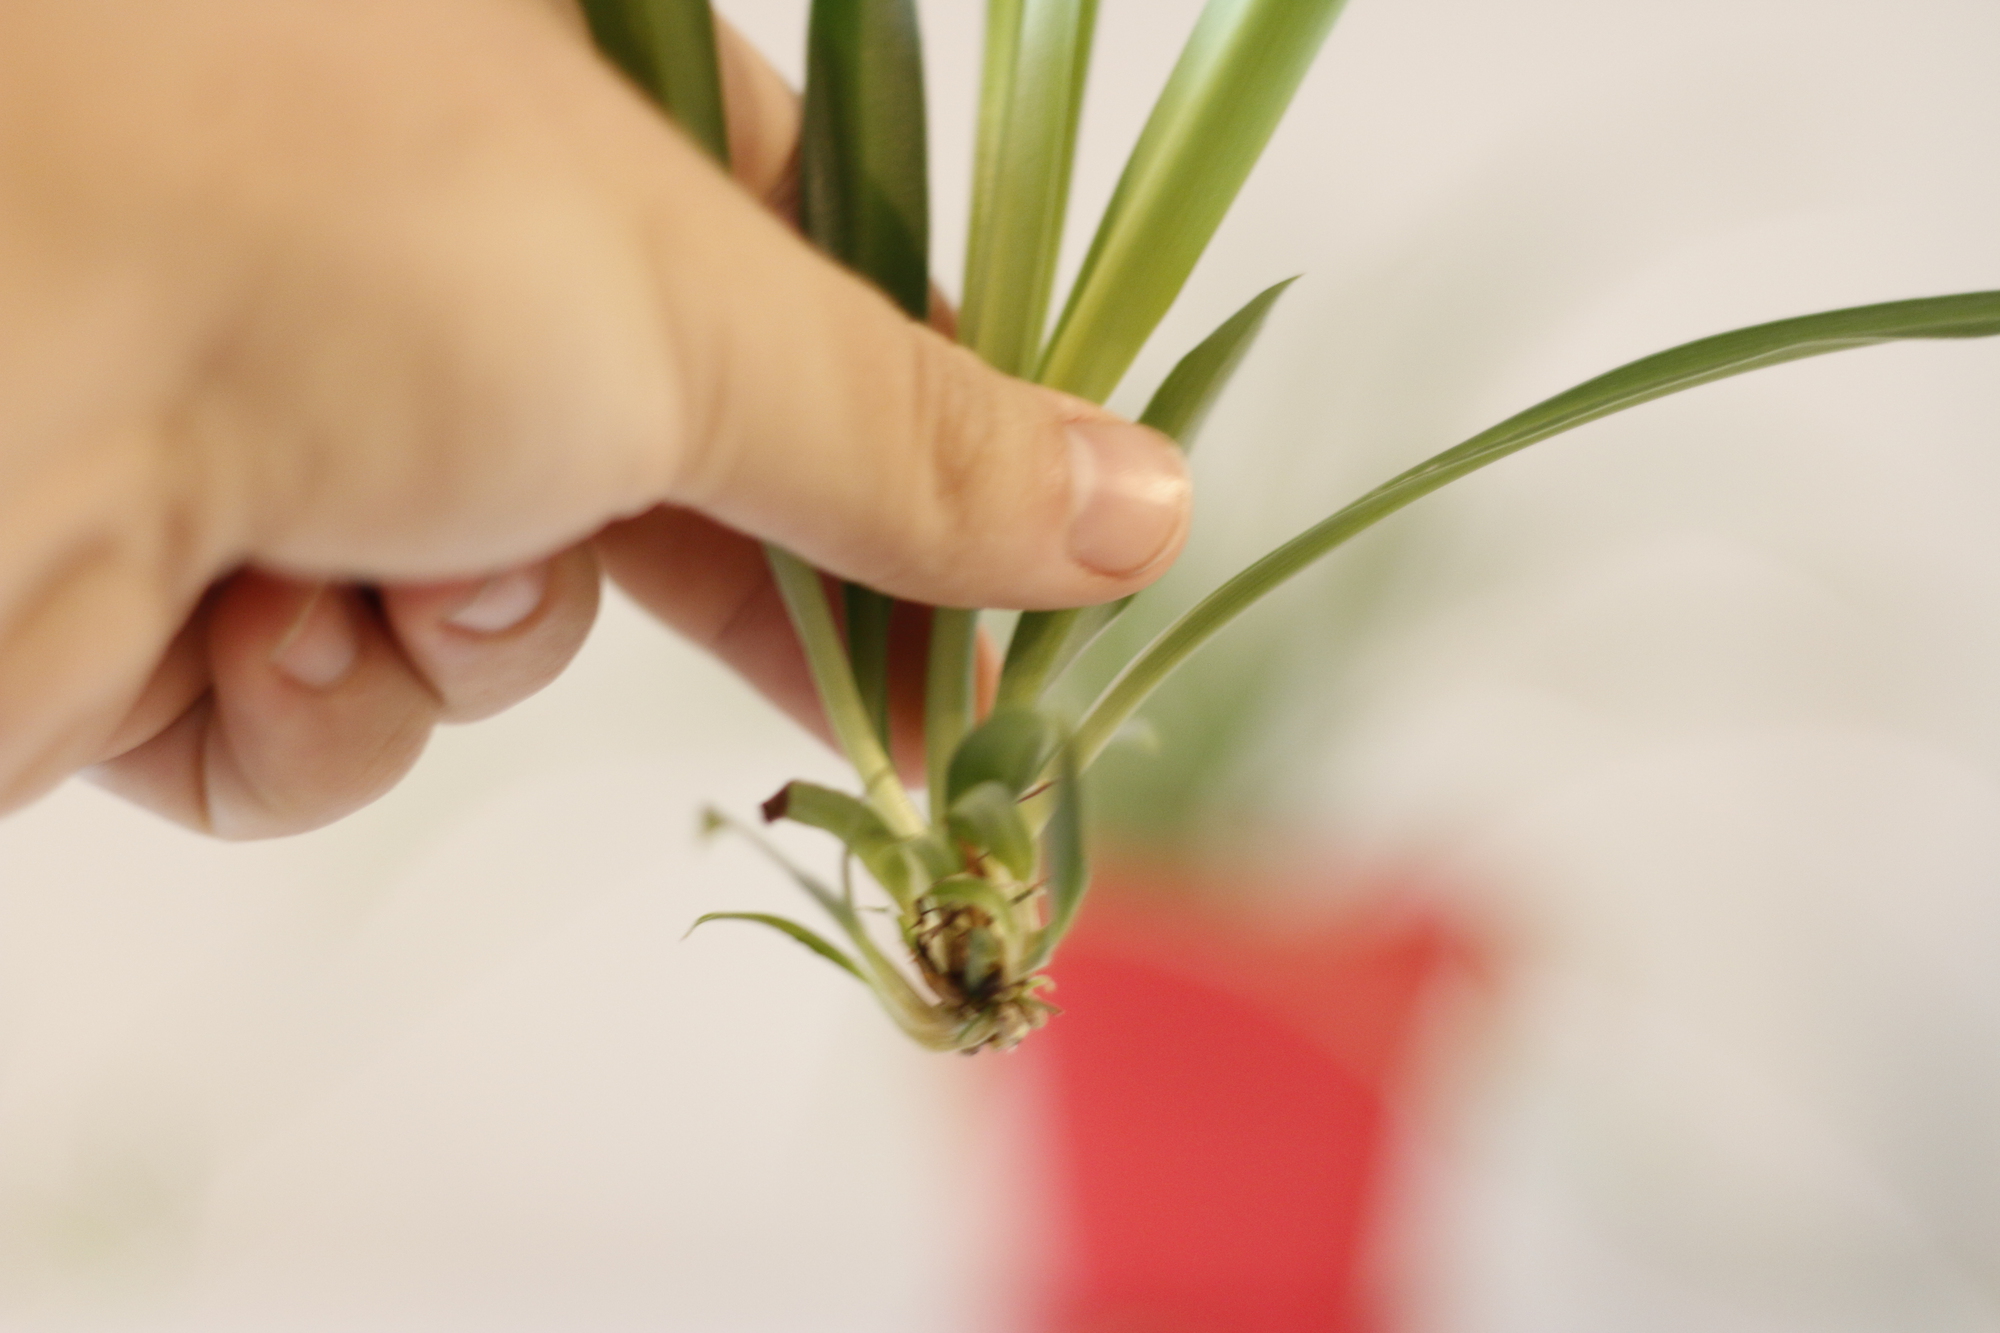
Spider plants, scientifically known as Chlorophytum comosum, are popular houseplants known for their attractive foliage and easy-to-care-for nature. These plants often produce small offshoots, commonly called “babies” or “spiderettes,” which dangle from the mother plant on long stems.
Cutting the babies off a spider plant is not necessary for the health of the parent plant, but it can be beneficial for propagation and maintaining a tidy appearance. If left attached, the babies will continue to grow and may even develop roots while still connected to the mother plant. This natural process allows spider plants to spread and create new plants in their native environments.
Removing the babies can help focus the plant’s energy on new growth and maintain a neater shape. It also provides an opportunity to propagate new spider plants. The removed offshoots can be easily rooted in water or soil to create new plants, making spider plants an excellent choice for those interested in expanding their indoor garden or sharing plants with friends.
Understanding Spider Plant Babies
Spider plant babies, also known as spiderettes or pups, are a fascinating aspect of spider plant growth. These offshoots play a role in the plant’s propagation and overall health.
What Are Spider Plant Babies?
Spider plant babies are small plantlets that grow from the parent plant’s long, arching stems. These miniature replicas develop at the ends of these stems, often hanging in mid-air. Spiderettes typically have small leaves and aerial roots.
As the pups mature, they grow larger and may even produce their own flowers. The baby plants remain attached to the parent via a thin stem, drawing nutrients until they’re ready for independent growth.
Spider plant babies can vary in size and number. Some plants produce only a few, while others create dozens of offspring. Factors like light, water, and overall plant health influence spiderette production.
Importance of Pups in Plant Health
Spider plant babies serve several purposes for the parent plant. They act as a natural propagation method, allowing the plant to spread and colonize new areas. This reproductive strategy helps ensure the species’ survival.
Pups also contribute to the plant’s aesthetic appeal. The cascading effect of multiple spiderettes creates a lush, full appearance that many plant enthusiasts find attractive. This feature has made spider plants popular choices for hanging baskets and elevated planters.
The production of babies can indicate a healthy, thriving spider plant. When a plant generates numerous spiderettes, it often signals that growing conditions are favorable. However, excessive pup growth may sometimes divert energy from the parent plant.
The Propagation Process
Spider plant propagation is a simple and rewarding process. It allows gardeners to create new plants from existing ones, expanding their collection or sharing with friends.
When to Propagate Spider Plant Babies
Spring and summer are the best seasons for propagating spider plants. During these months, the parent plant is actively growing and producing plantlets. Wait until the baby plants have developed small roots before removing them. These roots are usually visible as small nubs on the underside of the plantlet.
Check the size of the babies before propagating. They should be at least 2 inches in diameter. Larger plantlets have a higher chance of successful rooting. Remove the babies when they’re still attached to the parent plant but have started to develop their own root system.
Propagation Methods
There are two main methods for propagating spider plants: water propagation and soil propagation.
Water propagation:
- Cut the plantlet from the stolon
- Place it in a jar of water
- Change the water every few days
- Wait for roots to grow 2-3 inches long
- Transfer to soil
Soil propagation:
- Fill a small pot with well-draining potting mix
- Cut the plantlet from the parent plant
- Plant the baby directly in the soil
- Keep the soil moist but not waterlogged
- Roots will establish in 2-3 weeks
Both methods are effective, but soil propagation often results in stronger plants. Whichever method you choose, place the new plants in bright, indirect light and maintain consistent moisture for the best results.
Rooting Spider Plant Babies
Rooting spider plant babies is a simple and rewarding process. With the right techniques, you can easily propagate new plants from the offshoots of your mature spider plant.
Water Propagation Techniques
To root spider plant babies in water, start by removing them from the parent plant. Cut the stem close to the base of the offshoot using clean, sharp scissors. Place the baby plant in a clear glass or jar filled with room temperature water.
Ensure the roots are submerged while keeping the leaves above water. Change the water every few days to prevent stagnation. Within 1-2 weeks, you should see new roots forming.
Once the roots reach about 1-2 inches long, the baby plant is ready for potting. This method allows you to monitor root growth easily and provides a high success rate for propagation.
Potting Mix and Drainage Considerations
When potting rooted spider plant babies, use a well-draining potting mix. Combine equal parts peat moss, perlite, and regular potting soil for an ideal growing medium. This mixture promotes good drainage while retaining enough moisture for healthy growth.
Choose a pot with drainage holes to prevent water from pooling around the roots. A 4-inch pot is suitable for most spider plant babies. Place a layer of gravel or small stones at the bottom of the pot to improve drainage.
Water the newly potted plant thoroughly and allow excess water to drain. Place it in bright, indirect light and maintain slightly moist soil. Avoid overwatering, as spider plants prefer to dry out slightly between waterings.
Pruning and Care for Spider Plants
Spider plants benefit from regular pruning and proper care to maintain their health and appearance. Removing excess growth promotes better overall plant vigor and shape.
Pruning for Healthier Growth
Trim off brown or yellowing leaves at the base using clean, sharp scissors. Remove any damaged or dead foliage to improve the plant’s appearance. Cut off spider plant babies when they reach 2-3 inches long if you don’t want to propagate them.
Prune long stems to control the plant’s size and shape. Make cuts just above a leaf node to encourage new growth. Avoid removing more than 1/3 of the plant’s foliage at once to prevent stress.
Regular pruning helps maintain a compact, bushy form and redirects energy to new growth.
Optimal Conditions for Growth
Spider plants thrive in bright, indirect light. Place them near a north or east-facing window for ideal exposure. Avoid harsh direct sunlight, which can scorch the leaves.
Water thoroughly when the top inch of soil feels dry. Allow excess water to drain away. Spider plants prefer slightly moist soil but are sensitive to overwatering.
Feed with a balanced, water-soluble fertilizer monthly during the growing season. Reduce fertilizer in winter when growth slows.
Maintain temperatures between 60-80°F (15-27°C) for optimal growth. Spider plants can tolerate brief periods outside this range but may show stress.
Challenges in Spider Plant Propagation
Spider plant propagation can face several obstacles that gardeners need to address. These include pest management and water quality issues.
Dealing with Common Pests
Spider plants can attract various pests that hinder propagation efforts. Mealybugs often hide in leaf axils, sucking sap and weakening the plant. Spider mites may infest leaves, causing yellow spots and stunted growth. Aphids can cluster on new growth, distorting leaves and stems.
To combat these pests, regularly inspect plants and isolate affected ones. Wipe leaves with a damp cloth to remove insects. Neem oil or insecticidal soap can be effective treatments. For severe infestations, consider removing and discarding heavily affected parts.
Water Quality and Its Effects
Water quality plays a crucial role in spider plant health and propagation success. Chlorine and fluoride in tap water can cause brown leaf tips and poor growth.
Using distilled water or leaving tap water out overnight allows chlorine to evaporate. Rain water is another good option. If using tap water, let it sit for 24 hours before use.
Hard water with high mineral content may lead to salt buildup in the soil. This can affect nutrient uptake and root health. Consider using a water filter or collecting rainwater for best results.
Fertilizer use should be balanced with water quality. Over-fertilizing can compound issues caused by poor water quality, leading to leaf burn and root damage.
You may also like…


