
A mower that sputters on a slope, loses power halfway across the grass, or dies mid-cut and refuses to restart is usually starving. Somewhere between the tank and the engine, the fuel is being choked off, and the cheapest, most overlooked cause is a clogged fuel filter. It is one of the smallest parts on the machine and one of the least expensive, yet a filter packed with dirt, rust and gummy varnish will bring a healthy engine to a halt as surely as an empty tank. Checking and changing it is a fifteen-minute job that needs nothing more than a pair of pliers.
Most people never touch the fuel filter for years, and it works quietly right up until the day it does not. Learn where yours sits and what a blocked one looks like, and you can clear a mid-season breakdown yourself instead of loading the mower into the car for a workshop that charges an hour’s labour to fit a part that costs less than a coffee.
What the Fuel Filter Does and Why It Clogs
The filter is a small trap set in the fuel’s path to catch dirt, dust and debris before they reach the carburettor. An engine runs on a precise mix of fuel and air, and the tiny passages inside a carburettor that meter that mix are only fractions of a millimetre wide. A single speck of grit is enough to disturb the flow, lean out the mixture and rob the engine of power. The filter keeps that grit out, so the fuel arriving at the carburettor is clean enough to flow and burn properly.
Filters clog for reasons that build up slowly. Petrol left in the tank over months separates and leaves behind a sticky varnish and gum as its lighter parts evaporate. Modern petrol blended with ethanol draws in moisture, which rusts steel tanks from the inside and washes fine orange particles into the fuel. Grass dust and soil work their way past the cap every time you refuel. All of it ends up at the filter, which is exactly where you want it caught, until the day the filter is so loaded that fuel can no longer pass.
Mowers use one of three types. The replaceable canister filter is a small plastic barrel with pleated paper inside, joined into the fuel line at both ends. The tube or straw type is a slim device with a fine mesh at one end that slides inside the fuel line where it meets the tank. The third kind is a fixed metal mesh in the base of the tank where it feeds the line, which is not designed to be swapped out.
Where to Find It on Your Machine
Exact position changes from model to model, but the filter almost always sits on the fuel line that runs from the bottom of the tank to the carburettor, or just inside the tank itself. Follow the rubber line down from the tank and you will usually spot the canister or the straw within a hand’s length. A clear plastic canister is easy to identify, as you can see the pleated material through the casing. If you cannot find anything inline, your mower likely uses the fixed mesh inside the tank. Your owner’s manual will name the part and its location, and it is worth a two-minute read before you start so you know which type you are dealing with and can order the right replacement.
How to Check and Clean It Safely
Park the mower on flat ground, ideally on a hard floor such as a garage or shed, and let the engine cool completely before you go near the fuel system. Empty the tank first, either with a siphon, which costs around £8 (about $10), or by running the engine dry outdoors until it stops. A tank drained down means no petrol pouring out when you open the line.
Pull the rubber boot off the spark plug and move it clear of the plug before you touch anything else. This is the step people skip and the one that protects your hands. With the lead disconnected, the engine cannot fire even if the blade or a pulley turns while you work, so there is no risk of it kicking over. Keep a small plastic container and a rag ready to catch the fuel sitting in the line.
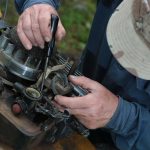
Find the fuel line and, with pliers, squeeze the spring clips holding it to the tank spigot and the filter, sliding each clip clear along the line. If the tank still holds fuel, pinch the line shut with the pliers or a clamp to stop it draining. Ease the line off and lift the filter out. On a canister type, look through the clear casing at the pleated paper. Debris sitting in the folds, or a deep brown discolouration, means the filter has done its work and needs replacing. There is no practical way to clean a canister, but they cost little. On a straw or tube type, look closely at the mesh end. If you can see dirt trapped in it, rinse it through with clean water until it runs clear, then let it dry before refitting, or simply fit a new one.
How to Fit a New One Without a Second Trip
With the old filter out, fitting the replacement takes only a few minutes. On a canister filter, push each cut end of the fuel line onto the spigots of the new unit and slide the spring clips back over the joints with the pliers. The one detail that catches people out is direction. Canister filters carry a small arrow on the casing showing which way the fuel should flow, from the tank to the carburettor, and fitting one back to front chokes the engine just as a blockage would. Line the arrow up with the flow before you clip it home.
A straw or tube filter goes back the same way it came out, mesh end into the line toward the tank, matching the orientation of the old one. Push it fully home, reconnect the line, and slide the clamps back into place. Refit the spark plug lead last, once every fuel connection is tight and the clips are seated. Two more mistakes to avoid: do not overtighten or force a clip, as a cracked plastic spigot means a fuel leak and a bigger repair, and do not fit a filter with the wrong micron rating for your engine. Filters are graded by how fine the mesh is, commonly around 40 to 80 microns, and matching the number on your old part or in the manual keeps the fuel flowing at the rate the carburettor expects.
How Often, What It Costs, and When It Is Something Else
Once a year is enough for most machines, fitted at the end of the mowing season or as part of a spring service before the grass takes off. A replacement inline filter costs roughly £4 to £9 (about $5 to $12), and you will find them at Screwfix, B&Q, Argos and Amazon, or from a dealer for your engine brand. Take the old one with you or note the part number off the casing so you match it exactly. A pair of needle-nose pliers, at around £6 to £12 ($8 to $15), is the only tool the job really needs.
Watch for the warning signs so you catch a filter before it strands you. An engine that struggles to start, stalls under load on longer grass, surges and dies, or loses power partway through a cut is often short of clean fuel. If a fresh filter does not cure the fault, the trouble has moved downstream to a gummed carburettor or a failing fuel pump, both of which are the next things to check. Left long enough, a starved engine runs lean and hot, which burns valves and pistons over time, so a part that costs a few pounds guards against a repair that costs a great deal more. Change the filter on schedule and the engine starts first pull and cuts cleanly from the first pass to the last.