The single visual change that lifts a tidy lawn to a professional looking lawn is a clean edge. You can mow perfectly straight stripes, feed regularly, water deeply, and the garden will still look unfinished if the lawn edge crumbles into the border. A sharp, defined edge does for a garden what a freshly trimmed beard does for a face. It makes everything else look intentional, and it takes about an hour twice a year to get right.
Most gardeners avoid edging because they think it takes specialist tools or hours of skilled work. It does not. A single afternoon with a half-moon edger costing around £20/$25 will get you a result that lasts most of the season. A string trimmer flipped vertically will let you maintain it in ten minutes a week. The trick is mostly in technique and in doing the work in the right order.
The Two Tools That Cover Almost Every Garden
For the initial cut, the half-moon edger is the right tool. It is a curved blade on a long shaft, shaped like the bottom of a spade but flattened into a wide crescent. The Bulldog Premier half-moon edger (around £30/$38 at Wickes or Home Depot) is the standard choice, made in Britain and lasting decades if you do not leave it outside in winter. Cheaper options at B&Q or Lowe’s run from £15/$19 and work fine for one or two seasons.
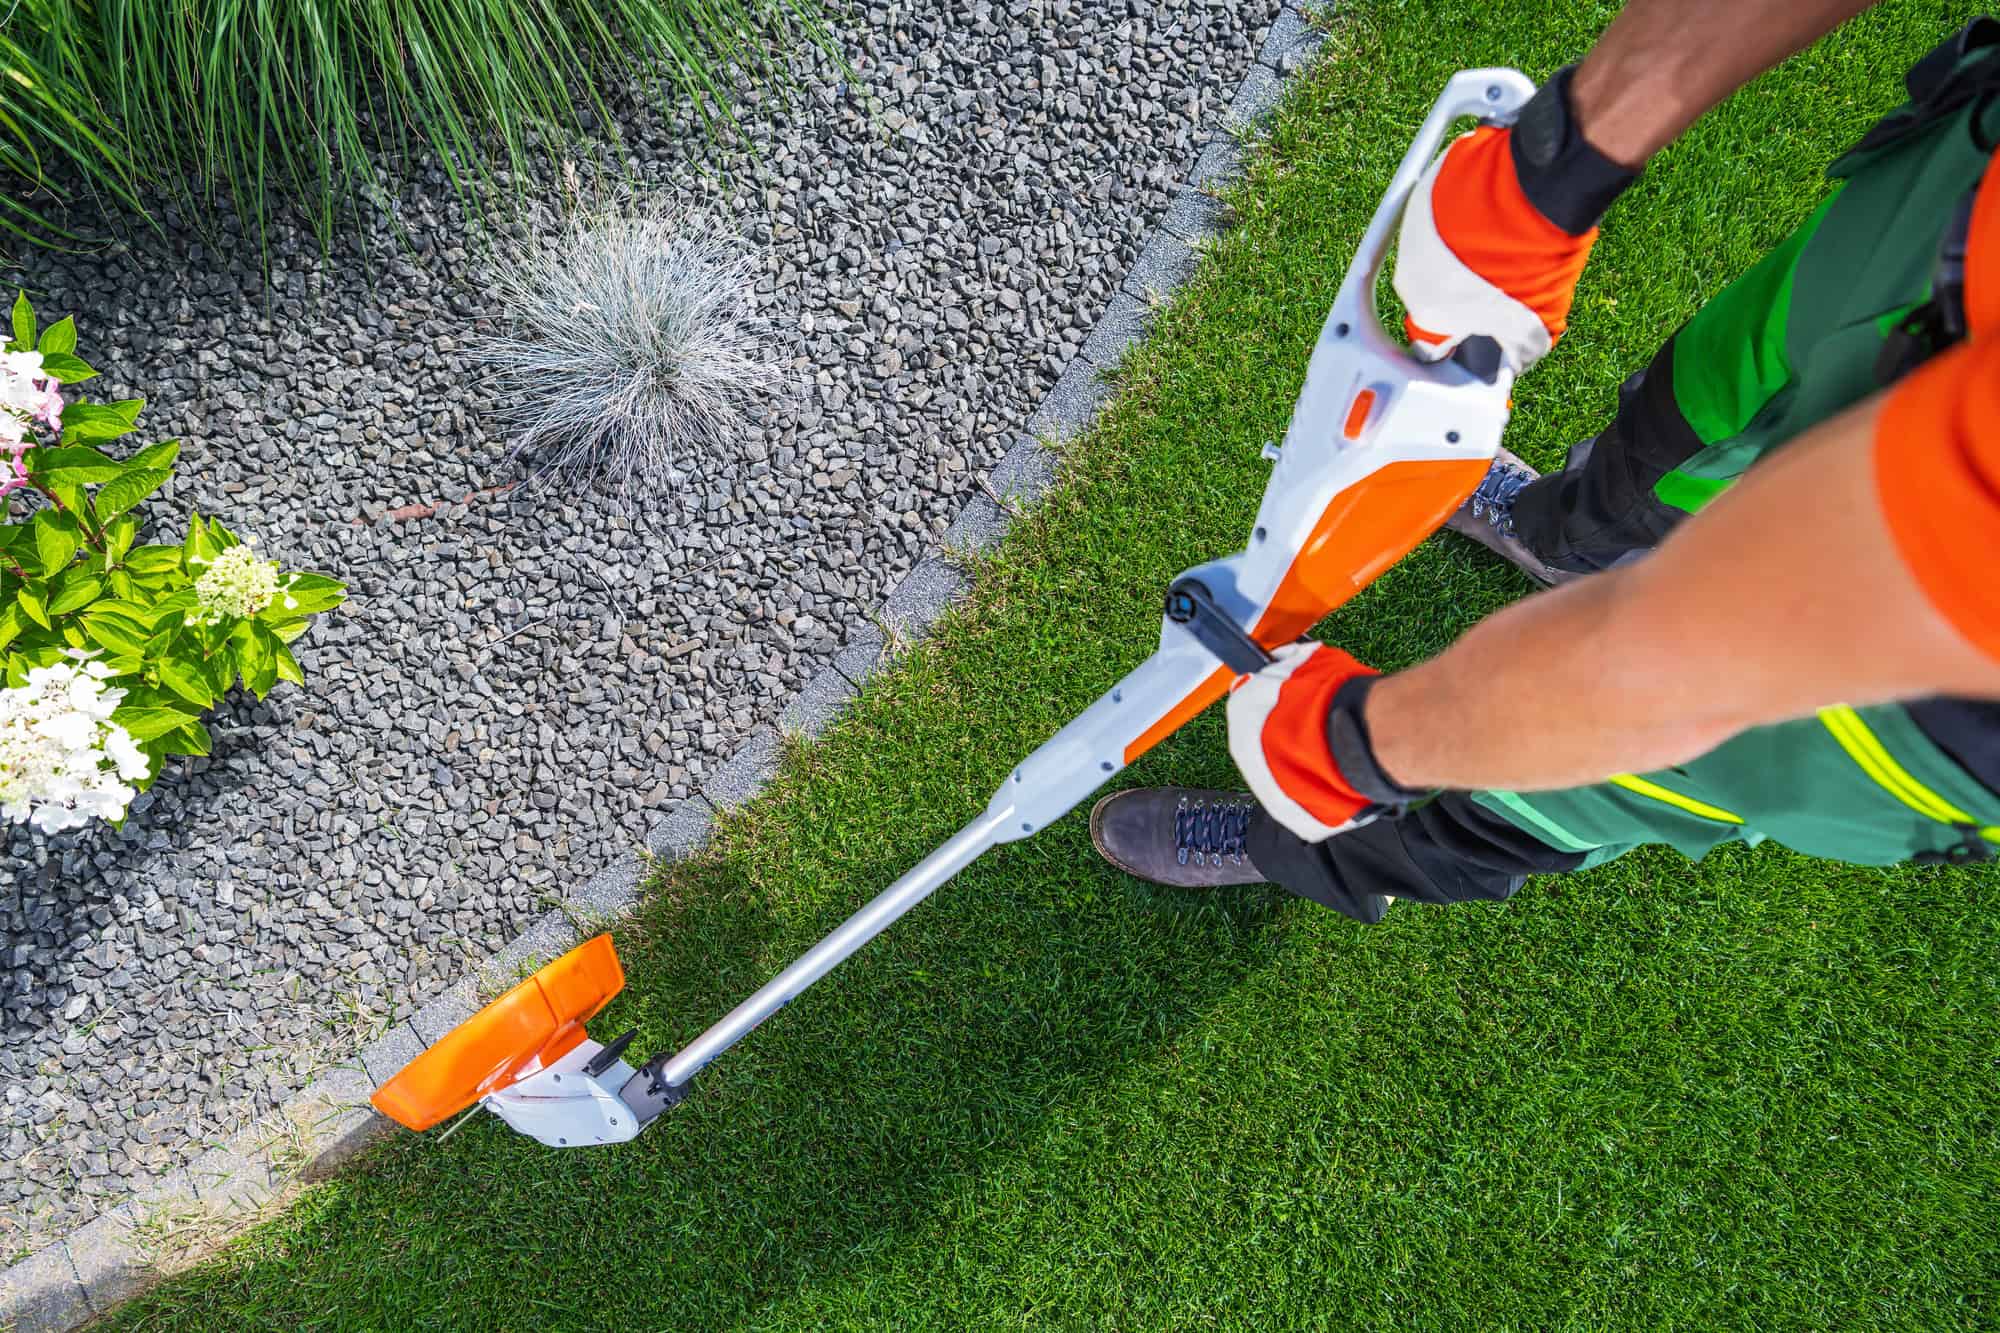
For the weekly maintenance, a string trimmer is faster than anything else. The Bosch EasyGrassCut 18-26 (around £85/$110 with a battery), the Ego ST1300E (around £160/$200), and the Stihl FSA 60 R (around £200/$255) all handle edging well. The key feature is that the head can be rotated 90 degrees so the line spins vertically against the edge of the lawn. Cheap models that only spin horizontally will work but are clumsier.
If you want a dedicated tool and have a large lawn, a wheeled blade edger is the professional choice. The McLane Gas Edger (around £450/$580) or the Worx WG896 (around £140/$180 corded electric) run a steel blade vertically against the edge and produce a perfectly square cut every time. For an average 200 square metre garden this is overkill, but on a quarter acre lot it pays for itself in time saved.
You also need a length of stiff garden hose or builder’s string line. Lay the hose along the line you want the edge to follow before you cut. You will be surprised how rarely your existing edge is actually straight. Most lawn edges have wandered by 5 to 10cm (2 to 4 inches) over the years and your eye no longer notices.
The Order of Operations That Saves Time
Mow first. A freshly cut lawn shows the existing edge clearly and gives you a flat surface to work against. Cut at your normal height, ideally 3 to 4cm (1.5 inches) for May, and use the bag if you can so the edge is not obscured by clippings.
Next, plan the edge. Walk the perimeter and look at where the line currently runs. Straight runs against a path or patio are easy. Curved beds need more thought. The most common mistake is making curves that are too tight. A flowing curve with a radius of at least 1.5 metres (5 feet) looks natural. Tight wobbles look like the lawn has been chewed.
For curved sections, lay a hose along the line you want. Step back and look at it from the far side of the lawn before you cut. Photograph it on your phone if you have a balcony or upstairs window. The view from above tells you everything about whether a curve is going to look right. For straight runs, drive two short canes into the ground at each end and stretch a string line between them, set at the height the new edge will be.
Now cut. Stand with one foot on the lawn side of the line, the other on the bed side. Hold the half-moon edger vertically, blade against your line, and step down firmly. On most soils you need the full weight of your body and a slight rocking motion to drive the blade in. Aim for a depth of 8 to 10cm (3 to 4 inches). This is the depth that defines the edge cleanly and stops grass roots creeping back in within a fortnight.
Work in overlapping sections, moving the blade forward by about half its width with each cut. Overlapping is what gives you the straight line. If you butt the cuts end to end you will see every join, especially on curves. Once a long section is cut, go back along the line and use the edger sideways to slice the loose strip of turf off the edge. That strip will be 3 to 5cm (1 to 2 inches) wide and it lifts away easily.
How Deep and How Often to Cut Your Edge
Depth is what most guides skip. An edge cut only 2 or 3cm deep looks fine for two weeks and then disappears. Grass roots are aggressive and will reach across an air gap of 2 or 3cm in a couple of weeks during May. The roots send up new shoots in the bed, and within a month the edge has crept outwards and the line is gone. Cut at 8 to 10cm deep and the gap is too far for the roots to bridge before you next mow.
The other reason for depth is the visual effect. A shallow edge reads as a line. A deep edge reads as a clean drop, with a clear shadow under it. That shadow is what makes the lawn look like it belongs to a public park rather than a domestic garden. From three metres away, depth is the single difference your eye picks up.
Frequency depends on growth rate. In May and June, when grass is growing hardest, plan to refresh the edge every two to three weeks with the string trimmer. In July and August, monthly. By September the edge cut in spring will be soft again and you may need a fresh half-moon pass before winter. Most gardeners do the deep cut in late April and again in early September, then maintain weekly with a string trimmer in between.
To maintain with a string trimmer, flip the head vertical with the guard facing you. Stand on the lawn, hold the trimmer head over the edge with the line spinning down into the gap, and walk slowly. Move at a steady pace, no faster than you would push a pushchair. Going faster tears the grass rather than cutting it and leaves an uneven, ragged result. If your trimmer has a guide wheel, set it against the hard edge of a path or patio for an automatic guide.
The Mistakes That Make a Mess of It
The first mistake is cutting on a slope or angle. The half-moon must stay vertical. If you let it tilt towards the bed, you cut a sloped edge that crumbles within weeks. If it tilts towards the lawn, you undercut the turf and risk pulling away whole sections. Hold the handle vertically and watch the shaft, not the blade, as you press down.
The second is rushing curves. A curved edge needs more frequent, smaller cuts to follow the line. Try to take big bites and you will end up with a faceted, angular curve that looks worse than no edge at all. On a tight curve, work in cuts of about 5cm (2 inches) wide.
The third is leaving the strip of turf in the bed. Lift every loose piece and either compost it, or use it to fill a low spot elsewhere in the lawn by knocking the soil off and laying the turf upside down in the dip. A piece of edge turf left in the bed will root again within weeks.
The fourth is forgetting the bed side. After you have cut the edge, run a hoe or hand fork along the bed for the first 10cm (4 inches) inwards and break up the soil. This gives you a fresh, dark line of bare earth right against the lawn, which is what creates the visual contrast. A clean edge against compacted, weedy soil does not look anywhere near as sharp as a clean edge against fresh, dark soil.
Done properly with a half-moon edger, a 30 metre (100 feet) garden perimeter takes about an hour from start to finish. That hour, twice a year, is the single highest visual return job in lawn care after mowing itself. There is more on weekly mowing technique at lawnandmowers.com, and the combination of clean edges, defined stripes, and a sharp blade is what separates an average lawn from one that gets compliments.